
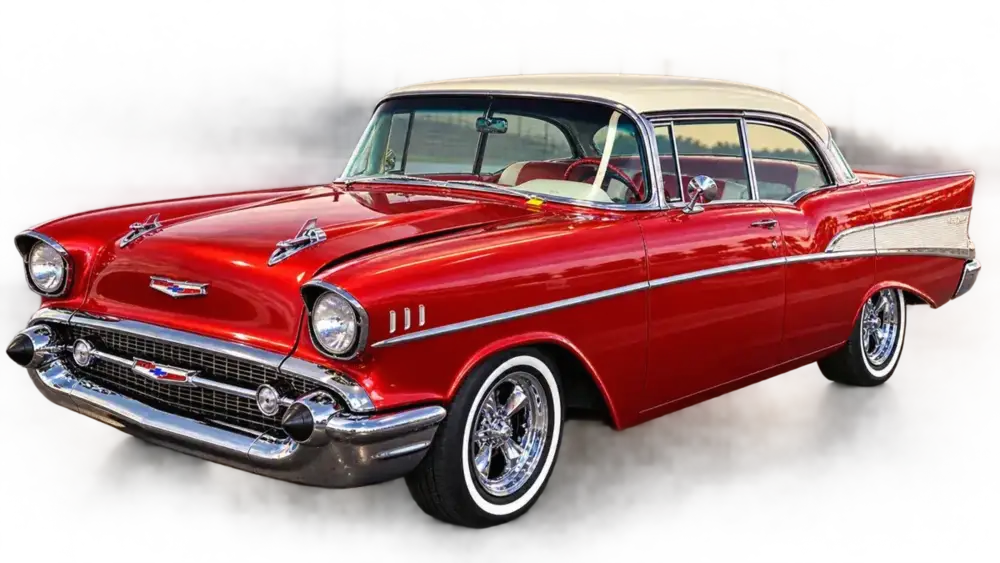
Classic-car paint work starts with a decision: factory-correct restoration, period-informed work or a modern custom system. Research and surface evidence should guide the color and coating plan.
Choose the restoration direction first
Painting a classic car begins with a decision about the intended finish. A factory-correct restoration, a period-informed restoration, and a modern custom finish can all be excellent, but they ask different questions. Factory-correct work prioritizes evidence of how the vehicle was originally finished. Period-informed work respects the era while allowing practical updates. A custom project may change the color, sheen, graphics, or coating system entirely. Decide this before buying paint, because the decision affects research, preparation, color evaluation, and how much of the vehicle must be refinished.
A classic-car paint project is not simply a larger version of a panel repair. Previous repairs, old filler, corrosion, multiple repaint layers, and long storage can conceal the condition of the body. Photograph the vehicle before disassembly and record which panels, edges, jambs, and removable parts belong in the scope. Paint planning should stay connected to the actual substrate and finish goal, not only to a color name or an attractive reference photo.
Research color before stripping evidence
Look for original paint-code labels, build records, surviving color chips, protected areas, and information from the vehicle or its previous owner. A code can identify a starting formula, but it does not prove that the visible paint on a decades-old car is original. Sun, oxidation, polishing, repairs, and earlier repainting can all change the sample. A hidden area may preserve evidence, but it may also have aged differently from an exposed panel.
Keep notes that distinguish original evidence from later assumptions. Photograph labels, mark which sample came from which panel, and retain small removable pieces rather than discarding them. If more than one color or variant appears possible, treat that as useful information. A physical spray-out is more informative than a screen image because it lets you evaluate ground color, metallic or pearl effect, sheen, and application behavior in the intended system.
For metallics, pearls, and other effect colors, the process can be part of the match. Particle orientation, pass consistency, film, ground coat, and viewing light influence the result. A formula may be correct while the application still reads differently. Exact formula, mixing, application, recoat, and safety instructions must come from the current documentation for the selected manufacturer system.
Inspect and prepare the body
Preparation should reveal problems rather than cover them. Inspect seams, edges, lower sections, wheel openings, repaired areas, and the back sides of panels where practical. Look for rust, moisture, loose coating, oil, wax, silicone, brittle filler, shrinking repairs, and unknown layers. A shiny surface is not necessarily sound, and a dull surface is not automatically ready for primer. The condition of the existing coating determines whether it can be retained, stabilized, or must be removed.
Clean using a method compatible with the substrate and the selected system. Remove contamination before sanding so it is not spread across the surface. Refine the surface profile in stages, protect bare metal from recontamination, and make repairs sound before building the next layer. Edges and transitions deserve special attention because scratches, repair lines, and uneven film can appear after color and gloss increase.
Primer is not a substitute for bodywork. Different primer categories may serve adhesion, surfacing, sealing, or corrosion-control roles, and the right choice depends on metal, filler, existing coating, topcoat, and exposure. Do not combine products because their labels sound similar. Verify compatibility, preparation, mixing, application, sanding, recoat, and safety requirements in the current technical data.
Plan the finish system and test panels
Single-stage and basecoat/clearcoat systems can each be appropriate, but authenticity, intended use, color type, repair strategy, and compatibility matter more than a universal preference. A modern system may reproduce the visual direction of an older finish while behaving differently during application and future repair. Discuss whether the project should prioritize historical appearance, easier future matching, a particular sheen, or a custom result.
Use a test panel when the color, effect, adhesion, or finish is sensitive. The test should represent the relevant preparation, ground coat, color layers, clear or final finish, and application method. Compare it beside the vehicle in more than one useful light and from more than one direction. For a tri-coat or pearl, record the ground layer and effect-layer process so the result can be repeated. A test can identify a problem while changes are still manageable.
Blending may be part of a repair plan, but it is not a way to skip preparation. Panel shape, adjacent color, effect orientation, existing finish, and the desired standard determine whether a blend is useful. A full color change also raises questions about jambs, edges, trunk areas, engine-bay areas, and other visible surfaces. Define those boundaries before estimating material.
Organize the work and avoid common mistakes
Common mistakes include choosing color from a photograph, assuming an old code is the complete answer, burying unsound coating, mixing incompatible products, and starting without documenting the finish. Other problems come from rushing after the surface looks dry, failing to control dust, or changing the process between panels without recording what changed. Keep product labels, formulas, test-panel notes, and observations about conditions together with the project.
Classic parts can be difficult to replace, so protect trim, glass, hardware, and original evidence during preparation. Masking is part of the finish plan, not an afterthought. Work only in a suitable, ventilated environment with the personal protection and handling controls required by the selected materials. Do not infer safe use from a familiar color or an older project.
For Pueblo and Southern Colorado work, strong sunlight can expose a small color or orientation difference, while wind, dust, dry air, and temperature changes can affect preparation and application. These are planning considerations, not reasons to invent a reducer choice or cure schedule. Observe the actual conditions and follow the selected manufacturer documentation.
What to bring to the paint counter
Bring the vehicle information, code labels, removable painted parts or chips, photos before disassembly, previous paint records, the desired restoration direction, and notes about earlier repairs. Explain where the vehicle will be viewed and whether the goal is factory-correct, period-informed, or custom. Those details help the conversation address color, finish, system, quantity, and future repair rather than treating the job as a generic repaint.
A classic-car paint guide can organize decisions, but it cannot replace the current technical and safety documentation for the exact products selected. Ask about compatibility, sample evaluation, preparation, equipment, storage, recoat, curing, and future touch-up records before committing to the full project.
A practical sequence
- 01
Define the project before selecting a product. Describe whether this is a repair, full repaint, restoration, exterior maintenance job or industrial item, and identify what area is actually included.
- 02
Inspect the existing surface in useful light. Record substrate, coating condition, contamination, repairs, moisture, corrosion, texture and any unknown layers. Photos are helpful, but a physical sample can answer questions a screen cannot.
- 03
Choose the system as a group. Preparation, primer or sealer, color or topcoat, clear where applicable, reducer or activator and application equipment must be compatible. Current manufacturer technical information controls exact mix, recoat, cure and safety details.
- 04
Test the plan before committing when color, effect, adhesion or finish is sensitive. A small prepared area or spray-out can reveal coverage, orientation, sheen and transitions while changes are still manageable.
- 05
Document what worked. Keep labels, color information, batch or formula notes, application observations and the conditions. A future repair is easier when the next person has evidence instead of a guess.
Common mistakes
- Buying a color before checking the substrate and existing coating.
- Treating a code, color name or internet photo as proof of a final visual match.
- Assuming one primer, reducer, nozzle or coat count fits every product.
- Applying over peeling, contaminated, damp or unknown material.
- Rushing the final inspection because the surface looks dry.
Professional considerations
Plan disassembly documentation, substrate inspection, repairs, primer, test panels, metallic or pearl behavior and the final finish together. Photos are useful for inspiration but unreliable for exact matching. A formula should be evaluated on a physical sample when accuracy matters.
Professionals also protect the next decision. They keep labels and project notes, test a small area when the result is sensitive, and stop when the substrate or material is not understood. If the work involves hazardous coatings, poor ventilation, unknown contamination or a condition outside the product data, get qualified help rather than improvising.
What to bring to D&S
- Original labels and historical records
- Surviving chip or removable painted part
- Photos before disassembly
- Desired restoration standard
- Notes on previous repainting
Pueblo / Southern Colorado consideration
Sun and dry conditions may have altered surviving color evidence. Protect samples and discuss how the vehicle will be displayed and judged in local light.
Local context is useful, but it does not override the selected product’s technical data or safety information. Conditions should be observed on the actual day and surface, especially when wind, dust, sun, temperature or low humidity can change the work.
Frequently asked questions
Can I use this guide as a product specification?
No. It is a planning guide. The current technical data and safety information for the exact product and use control the work.
What if I do not know what is already on the surface?
Say that clearly. Unknown layers are important information; a small test and an in-person evaluation are safer than assuming compatibility.
Does weather change the plan?
Yes. Temperature, wind, dust, humidity and surface condition can change application and cure. Use the selected system’s limits and ask D&S when conditions are uncertain.
Published by D&S Paint Center, Inc. · © 2026 D&S Paint Center. All rights reserved.
Bring the project to D&S.
Bring the photos, product labels, dimensions or physical sample relevant to this question. The Pueblo counter can help discuss a practical next step.